Using OnToology: Tutorial
1. Authorizing Ontoology
1.1. Enter your repository i.e. myuser/myrepo

Enter the repository that you want OnToology to track. At the moment we only support user repositories. If you have an organization repository (or a repository that is not under your repository) you can fork that repository and add the fork url (your-username/the-repo-name).
1.2. Github redirects
If it is your first time, OnToology will redirect you to GitHub. This step is needed to authorize OnToology to track your repository.
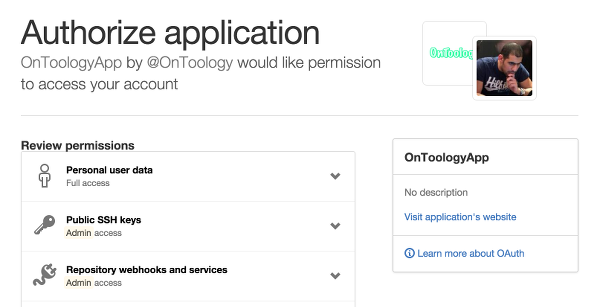
1.3. Authorize OnToology to access your repository by clicking on "Authorize Application"
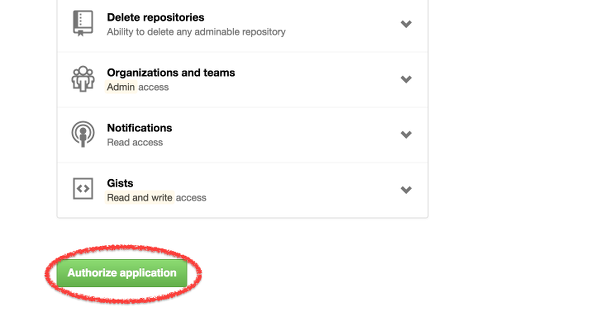
By clicking on "Authorize Application", you authorize OnToology to track your repository. DOn't worry, OnToology will never modify your code or ontologies.
2. Managing your repositories in Ontoology
2.1 Repository overview
To check your tracked repositories, click on the "My Repositories" tab:
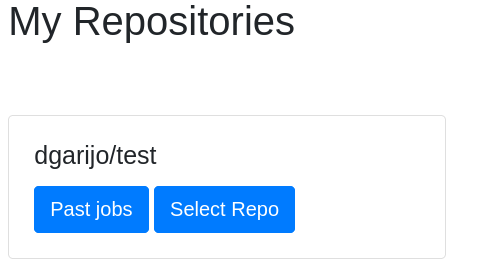
By selecting a repository (click on "Select Repo"), you will see a screen with the individual configuration of all the ontologies present in that repository.

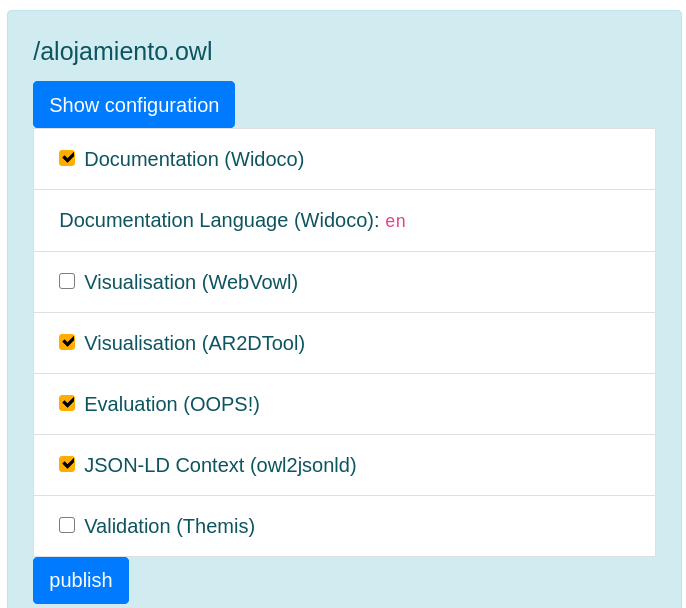
By clicking on "show configuration" in one of them, a menu with its current configuration will be displayed. The configuration includes the options which are selected when OnToology is contributing materials to your repository. For example, in the image below OnToology is configured to push documentation, diagrams, evaluation reports and JSON-LD contexts, but not validation or WebVowl diagrams.
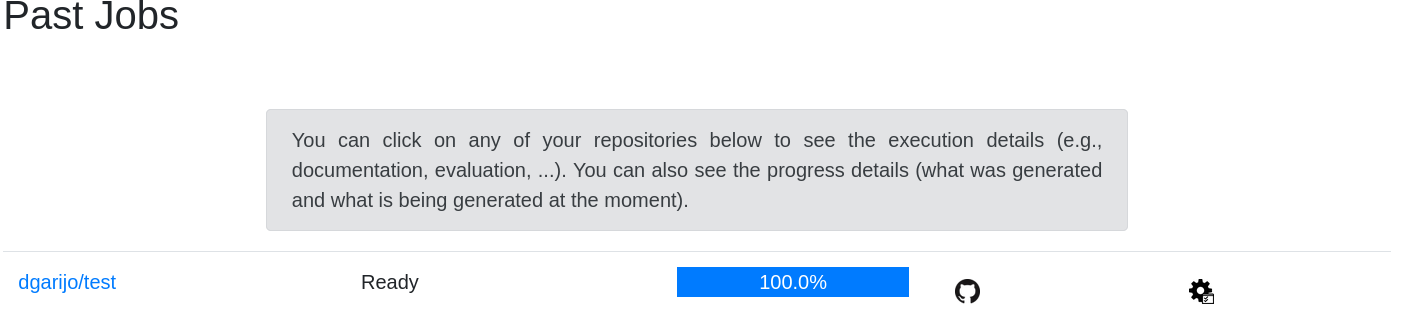
2.2 Check repository status and past jobs
You can also check your past jobs by clicking on "My Repositories -> Past Jobs". You will see the status of your current repositories (in case OnToology is still processing some of them) and a history of your past jobs.
3. Accepting Ontoology changes
Once OnToology finishes processing your ontologies, you will receive a pull request on your repository. In order to accept the proposed changes, just follow the steps below:3.1 Click on the pull requests
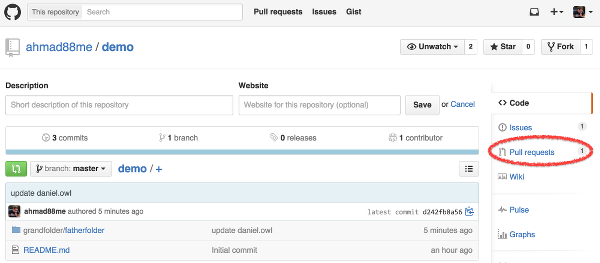
Once you make a change to any of your ontologies (in the tracked repository) and push these changes, OnToology will (re)generate the associated documentation, diagrams and evaluation reports; and will create a pull request for your approval.
3.2 Click on the pull request from OnToology
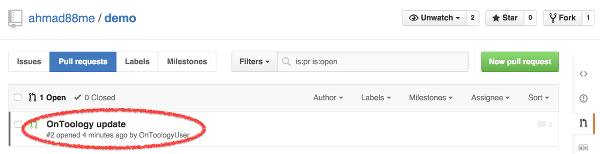
Next, you will need to click on the pull request generate by OnToology so see the changes and merge it to your repository.
3.3 Merge the pull request
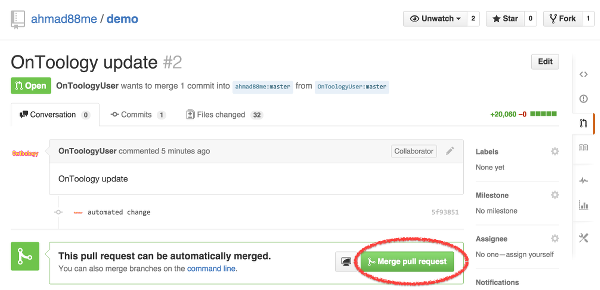
Click on the "Merge pull request" button to accept the generated resources to your repository.
3.4 Confirm to merge the pull request
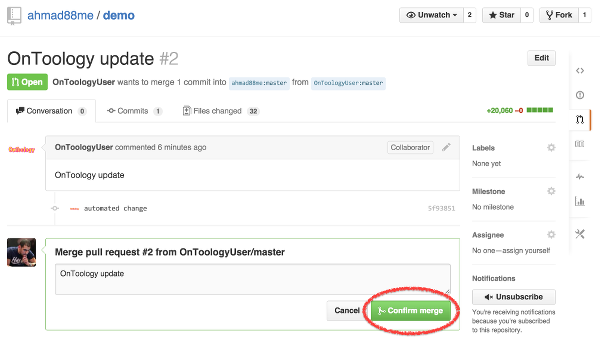
GitHub requires you to confirm the pull request to accept the changes (resources generated by OnToology). Simply click on the "Confirm merge" button.
3.5 Now the pull is merged and you will see an OnToology folder with all generated files inside
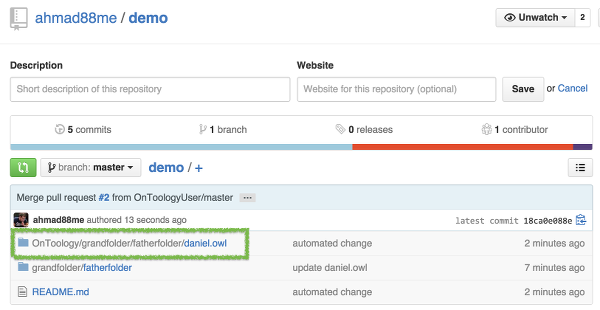
All generated resources are located under a folder called "OnToology" in your repository, the structured of your repository is mimicked inside the "OnToology" folder.
4. Publishing OnToologies using a permanent identifier
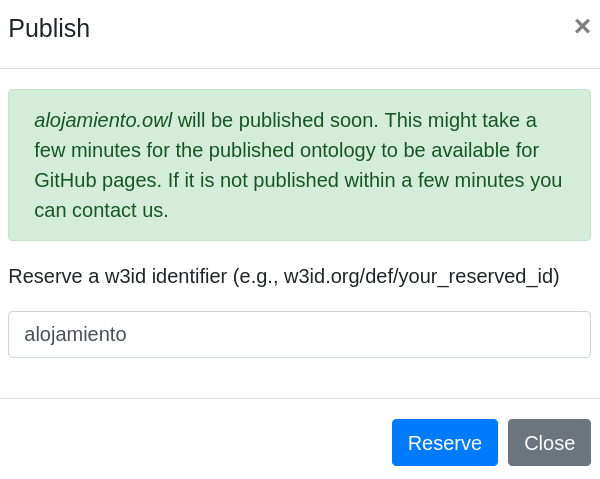
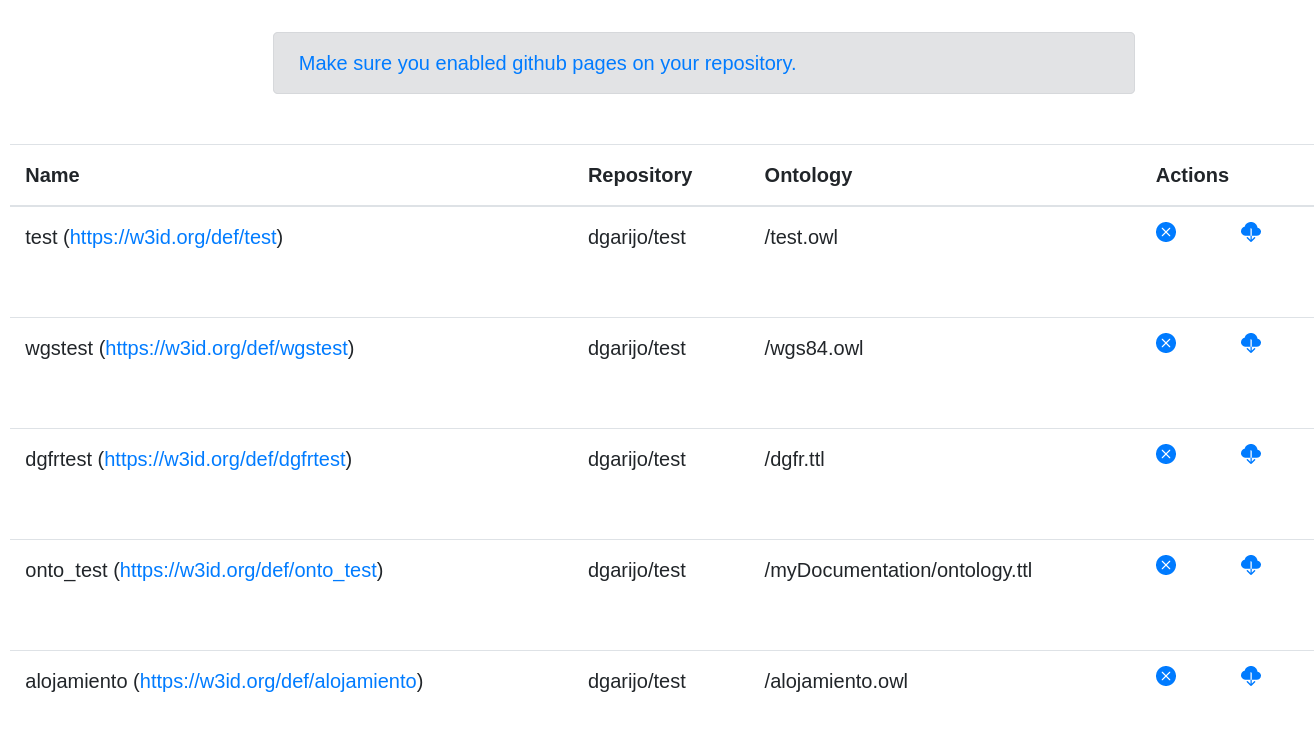
Select the identifier you want to give to your ontology. For example, if you select "alojamiento", the w3id will be "https://w3id.org/def/alojamiento". Identifiers are unique, so OnToology will not allow repeated identifiers. Once you have reserved an id, you can go to "My Repositories -> My Published Ontologies". You should see a screen similar to the one below. The available actions are to "unpublish" a published ontology; or download a bundle in case you prefer to publish it somewhere else.
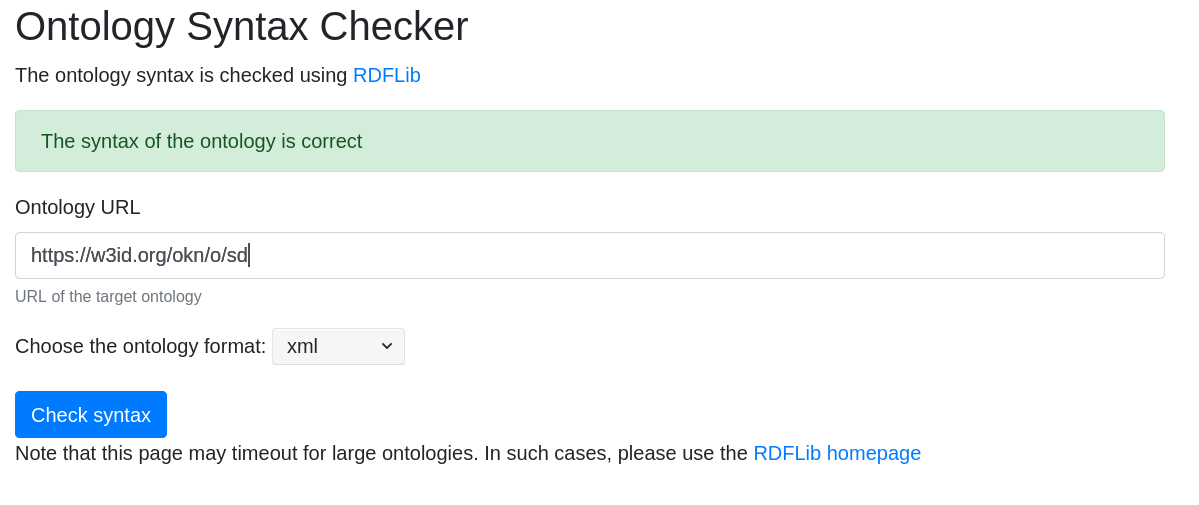
5. Validating ontology syntax
If there are any problems processing your ontologies, you may validate them using the custom syntax validator in OnToology. To use it, just click on "My Repositories" and select "Syntax Validator". You will see a screen like the one in the figure below. Simply add your ontology URI and serialization, and OnToology will tell you whether there are errors parsing it or not.
Ontology Engineering Group
Need help? contact us at: ontoology (at) delicias.dia.fi.upm.es
Follow us @OnToology